Many Cisco APs can operate in autonomous mode by running an IOS image, much like many other Cisco products. You can configure an AP through any of the following methods:
* A terminal emulator connected to the AP's console port
* Telnet or Secure Shell (SSH) to the APs IP address
* Use a web browser to access a graphical user interface (GUI) at the APs IP address
At a minimum, you would have to configure one or more SSIDs and some wireless security settings. In addition, you would have to set the transmit power level and channel number for each of the AP's radio.
You should connect the Ethernet port to a switch port on the wired network. The console port can remain disconnected unless you need to use it. A sticker on the AP provides the model and serial numbers, as well as the Ethernet port's MAC address.
Below is my Cisco AIR-SAP1602E standalone access point, the ports and sticker (which includes AP model, serial number and MAC address) can be found at the back. I also included its initial boot up console output.


Boot from flash
IOS Bootloader - Starting system.
FLASH CHIP: Micron N25Q256
Xmodem file system is available.
flashfs[0]: 183 files, 7 directories
flashfs[0]: 0 orphaned files, 0 orphaned directories
flashfs[0]: Total bytes: 31936000
flashfs[0]: Bytes used: 10427904
flashfs[0]: Bytes available: 21508096
flashfs[0]: flashfs fsck took 10 seconds.
Reading cookie from SEEPROM
Base Ethernet MAC address: f0:7f:06:54:25:1f
************* loopback_mode = 0
button pressed for 15 seconds // I'VE PRESSED THE RESET BUTTON AT THE BACK
process_config_recovery: set IP address and config to default 10.0.0.1
Loading "flash:/ap1g2-k9w7-mx.152-2.JB2/ap1g2-k9w7-mx.152-2.JB2"...#############################
File "flash:/ap1g2-k9w7-mx.152-2.JB2/ap1g2-k9w7-mx.152-2.JB2" uncompressed and installed, entry point: 0x100000
executing...
Restricted Rights Legend
Use, duplication, or disclosure by the Government is
subject to restrictions as set forth in subparagraph
(c) of the Commercial Computer Software - Restricted
Rights clause at FAR sec. 52.227-19 and subparagraph
(c) (1) (ii) of the Rights in Technical Data and Computer
Software clause at DFARS sec. 252.227-7013.
cisco Systems, Inc.
170 West Tasman Drive
San Jose, California 95134-1706
Cisco IOS Software, C1600 Software (AP1G2-K9W7-M), Version 15.2(2)JB2, RELEASE SOFTWARE (fc1) // K9W7 IOS USED BY AUTONOMOUS AP
Technical Support: http://www.cisco.com/techsupport
Copyright (c) 1986-2013 by Cisco Systems, Inc.
Compiled Mon 29-Jul-13 12:16 by prod_rel_team
Initializing flashfs...
FLASH CHIP: Micron N25Q256
flashfs[3]: 183 files, 7 directories
flashfs[3]: 0 orphaned files, 0 orphaned directories
flashfs[3]: Total bytes: 31808000
flashfs[3]: Bytes used: 10427904
flashfs[3]: Bytes available: 21380096
flashfs[3]: flashfs fsck took 9 seconds.
flashfs[3]: Initialization complete.
flashfs[4]: 0 files, 1 directories
flashfs[4]: 0 orphaned files, 0 orphaned directories
flashfs[4]: Total bytes: 11999232
flashfs[4]: Bytes used: 1024
flashfs[4]: Bytes available: 11998208
flashfs[4]: flashfs fsck took 0 seconds.
flashfs[4]: Initialization complete....done Initializing flashfs.
Warning: the compile-time code checksum does not appear to be present.
Radio0 present 8764B 8000 0 A8000000 A8010000 0
Rate table has 180 entries (48 SGI/72 BF variants)
Radio1 present 8764B 8000 0 88000000 88010000 4
This product contains cryptographic features and is subject to United
States and local country laws governing import, export, transfer and
use. Delivery of Cisco cryptographic products does not imply
third-party authority to import, export, distribute or use encryption.
Importers, exporters, distributors and users are responsible for
compliance with U.S. and local country laws. By using this product you
agree to comply with applicable laws and regulations. If you are unable
to comply with U.S. and local laws, return this product immediately.
A summary of U.S. laws governing Cisco cryptographic products may be found at:
http://www.cisco.com/wwl/export/crypto/tool/stqrg.html
If you require further assistance please contact us by sending email to
export@cisco.com.
Warning: the compile-time code checksum does not appear to be present.
cisco AIR-SAP1602E-A-K9 (PowerPC) processor (revision B0) with 98294K/32768K bytes of memory.
Processor board ID FGL1835XABC
PowerPC CPU at 533Mhz, revision number 0x2151
Last reset from power-on
1 Gigabit Ethernet interface
2 802.11 Radios
32K bytes of flash-simulated non-volatile configuration memory.
Base ethernet MAC Address: F0:7F:06:54:25:1F
Part Number : 73-14508-04
PCA Assembly Number : 000-00000-00
PCA Revision Number :
PCB Serial Number : FOC18335DKG
Top Assembly Part Number : 800-38553-01
Top Assembly Serial Number : FGL1835XABC
Top Revision Number : A0
Product/Model Number : AIR-SAP1602E-A-K9
Press RETURN to get started!
*Mar 1 00:00:11.919: %SOAP_FIPS-2-SELF_TEST_IOS_SUCCESS: IOS crypto FIPS self test passed
*Mar 1 00:00:13.703: %SOAP_FIPS-2-SELF_TEST_RAD_SUCCESS: RADIO crypto FIPS self test passed on interface Dot11Radio 0
*Mar 1 00:00:14.815: %SOAP_FIPS-2-SELF_TEST_RAD_SUCCESS: RADIO crypto FIPS self test passed on interface Dot11Radio 1
*Mar 1 00:00:15.755: not a autoconfig enabled device!!!
*Mar 1 00:00:17.083: %LINK-6-UPDOWN: Interface GigabitEthernet0, changed state to up
*Mar 1 00:00:18.083: %LINEPROTO-5-UPDOWN: Line protocol on Interface GigabitEthernet0, changed state to up
*Mar 1 00:00:26.771: AUTOINSTALL: GigabitEthernet0 is assigned 192.168.1.11
*Mar 1 00:01:14.943: Starting Ethernet promiscuous mode
*Mar 1 00:01:15.007: %LINK-5-CHANGED: Interface Dot11Radio0, changed state to administratively down
*Mar 1 00:01:15.007: %LINK-5-CHANGED: Interface Dot11Radio1, changed state to administratively down
*Mar 1 00:01:16.007: %LINEPROTO-5-UPDOWN: Line protocol on Interface Dot11Radio0, changed state to down
*Mar 1 00:01:16.007: %LINEPROTO-5-UPDOWN: Line protocol on Interface Dot11Radio1, changed state to down
*Mar 1 00:01:20.527: %SYS-5-RESTART: System restarted --
Cisco IOS Software, C1600 Software (AP1G2-K9W7-M), Version 15.2(2)JB2, RELEASE SOFTWARE (fc1)
Technical Support: http://www.cisco.com/techsupport
Copyright (c) 1986-2013 by Cisco Systems, Inc.
Compiled Mon 29-Jul-13 12:16 by prod_rel_team
*Mar 1 00:01:20.527: %SNMP-5-COLDSTART: SNMP agent on host ap is undergoing a cold start
*Mar 1 00:01:21.511: %LINEPROTO-5-UPDOWN: Line protocol on Interface BVI1, changed state to up
*Mar 1 00:01:28.259: %CDP_PD-4-POWER_OK: Full power - NEGOTIATED inline power source
*Mar 1 00:01:31.531: %DHCP-6-ADDRESS_ASSIGN: Interface BVI1 assigned DHCP address 192.168.1.12, mask 255.255.255.0, hostname ap
ap>enable
Password: Cisco // INITIAL LOGIN AND ENABLE PASSWORD IS Cisco
By default, an AP will try to use Dynamic Host Configuration Protocol (DHCP) to request an IP address for itself. If it is successful, you can connect to it and interact with its GUI or command-line interface (CLI). If not, the AP will use the static IP address 10.0.0.1/26. You can also use the console port to configure a static IP address on the BVI interface of the AP, but it is usually more flexible and convenient to let it request an address on its own.
An autonomous AP binds the IP address to its bridged-virtual interface (BVI), which is a logical interface used to bridge the physical wired and wireless interfaces. If you are connected to the AP's console port, you can display the IP address with the show interface bvi1 command.
ap#show interface bvi1
BVI1 is up, line protocol is up
Hardware is BVI, address is f07f.0654.251f (bia f07f.0654.251f)
Internet address is 192.168.1.12/24 // TYPE THE IP ON BROWSER TO USE GUI (HTTP)
MTU 1500 bytes, BW 54000 Kbit/sec, DLY 5000 usec,
reliability 255/255, txload 1/255, rxload 1/255
Encapsulation ARPA, loopback not set
Keepalive set (10 sec)
ARP type: ARPA, ARP Timeout 04:00:00
Last input 00:01:53, output never, output hang never
Last clearing of "show interface" counters never
Input queue: 0/75/0/0 (size/max/drops/flushes); Total output drops: 0
Queueing strategy: fifo
Output queue: 0/0 (size/max)
5 minute input rate 0 bits/sec, 0 packets/sec
5 minute output rate 0 bits/sec, 0 packets/sec
7 packets input, 1242 bytes, 0 no buffer
Received 0 broadcasts (0 IP multicasts)
0 runts, 0 giants, 0 throttles
0 input errors, 0 CRC, 0 frame, 0 overrun, 0 ignored, 0 abort
8 packets output, 1302 bytes, 0 underruns
0 output errors, 0 collisions, 0 interface resets
0 unknown protocol drops
0 output buffer failures, 0 output buffers swapped out
By default, an autonomous AP has its radios disabled and does not have any SSIDs configured This is done to prevent the new AP from interfering with any existing signals before you have a chance to configure it. This also prevents anyone from inadvertently discovering a wireless signal coming from the AP before you can secure it. The easiest method you can use to configure an autonomous AP is to use its web interface. Once you know the AP's IP address, you can open a web browser to it. By default, you can leave the username blank and enter the password as Cisco.


At the CCNA Wireless level, you need to be able to perform basic configuration tasks on autonomous APs. Therefore, you should be familiar with only the Summary and Easy Setup menus at the upper-left corner of the web page, as found under the Home tab. To use the Easy Setup page, you need to enter the following information about the AP:
* Hostname
* Method of IP address assignment
* For a static address: IP address, subnet mask, default gateway
* An administrative username and password
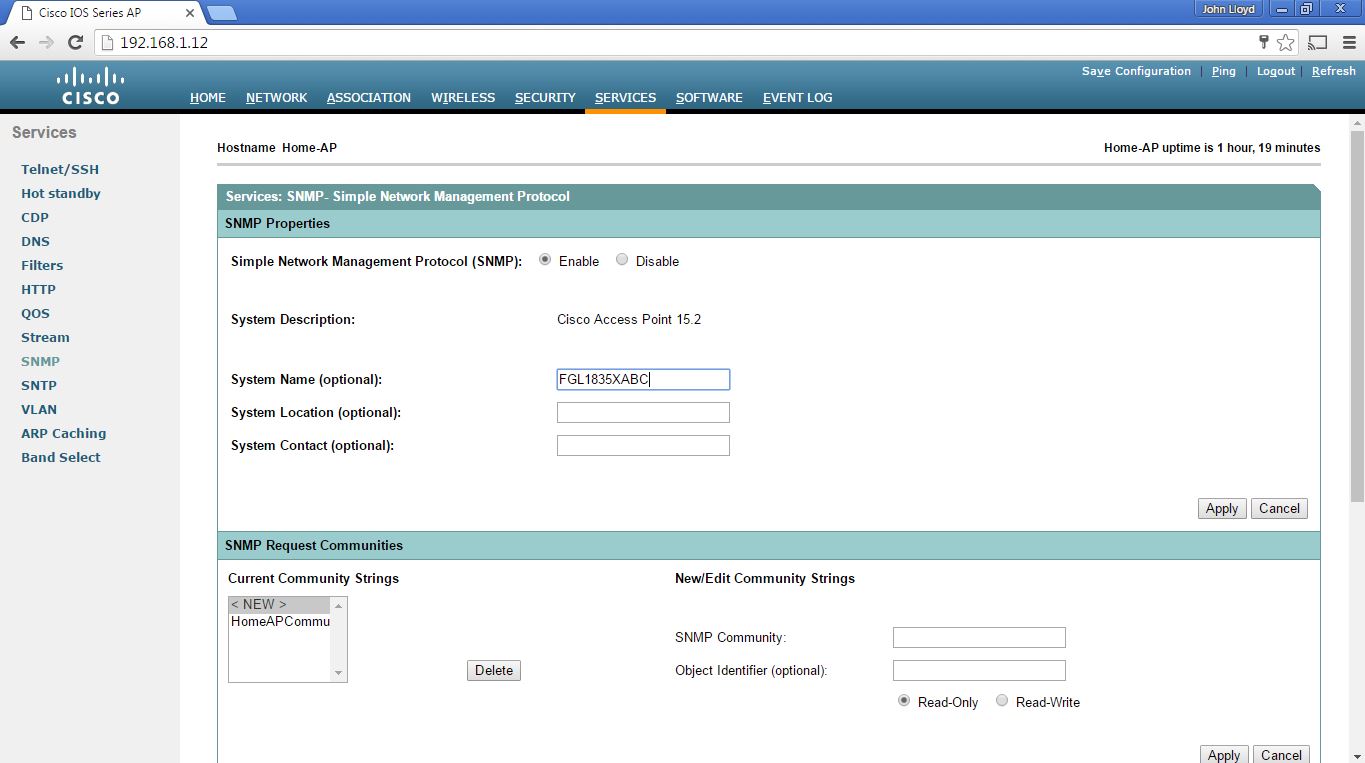
* SNMP community


Next, select the type of wireless security you want to offer on the SSID. By default, each radio is configured to operate in the Access Point role, so that the AP offers an active BSS. You can select one of the following roles instead from the Role in Radio Network drop-down menu:
* Repeater - The AP will associate with another nearby AP automatically, to repeat or extend that AP's cell coverage. The Ethernet port will be disabled.
* Root bridge - The AP uses its Ethernet port to connect to bridge the wired network to a remote wireless bridge over a point-to-point or point-to-multipoint link. No wireless clients will be allowed to associate.
* Non-Root Bridge - The AP will act as a remote wireless bridge and will connect to a root bridge AP over a wireless link.
* Workgroup Bridge - The AP will use one radio to associate with a nearby Cisco access point, as if it is a wireless client. The AP bridges between its radio and its Ethernet port. You can use an AP in workgroup bridge (WGB) mode to provide wireless client capability to wired-only devices.
* Universal Workgroup Bridge - The AP will act as a workgroup bridge to associate with Cisco and non-Cisco access points.
* Scanner - The AP will use its radio to scan channels and collect data.
* Spectrum - The AP will devote its radios to scanning the frequency band and collecting information about RF usage and interference.
The Optimize Radio Network drop-down menu enables you to select how the AP will optimize its cell for wireless clients. By default, the AP will offer data rates that can provide good range and throughput. You can select Throughput to leverage higher data rates at the expense of cell range or Range to require the lowest data rate for maximum cell range.
At the bottom of the Radio Configuration page, you can select the channel that the AP will use. By default, the channel is set to Least-Congested (2.4 GHz) and Dynamic Frequency Selection (5 GHz) so that the AP will scan and find a channel that it considers to be most viable in its current location. This is not always a best practice because the AP will choose any channel number that it sees fit. That means the 2.4-GHz radio might end up on channel 3 if channels 1 and 11 are already in use. A better practice is to select a specific channel for each radio instead. Each radio has a transmit power setting, too - each defaults to its maximum power rating or a specific dBm level that you select. Click Apply for the settings to take effect.

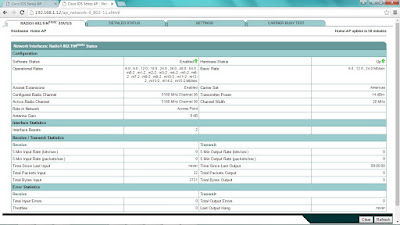
At this point of the configurations, you do not necessarily have a functional AP because the radios are still disabled. To enable a radio, navigate to the AP's home page and select Network > Network Interface > Radio0-802.11N22.4GHz or Radio1-802.11N5GHz. Click the Settings tab to open it, and then select the Enable button next to Enable Radio.


As you are configuring an autonomous AP, keep in mind that the changes you make are applied to the running configuration and will not be saved if the AP loses power or reboots. Click the Save Configuration link in the upper-right corner of the screen to save the whole AP configuration into non-volatile memory (NVRAM).

Below are the screenshots tested from my iPhone which was associated to the SSID Lagura.


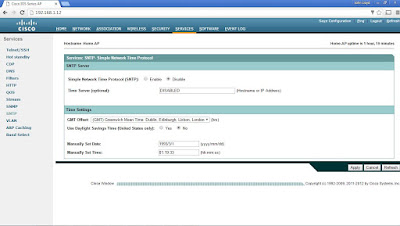
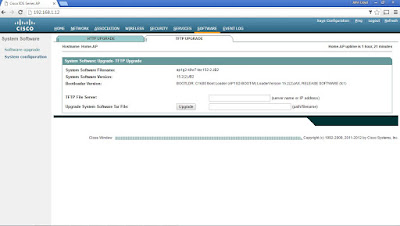
Below are the screenshots taken from each tab. You can check the associated wireless clients on the autonomous AP by going to the Association tab.


You can change the AP's management IP address (from DHCP to static IP) by going to Network > Network Interface > IP Address.


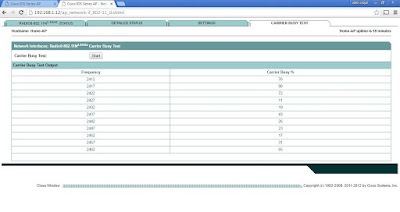
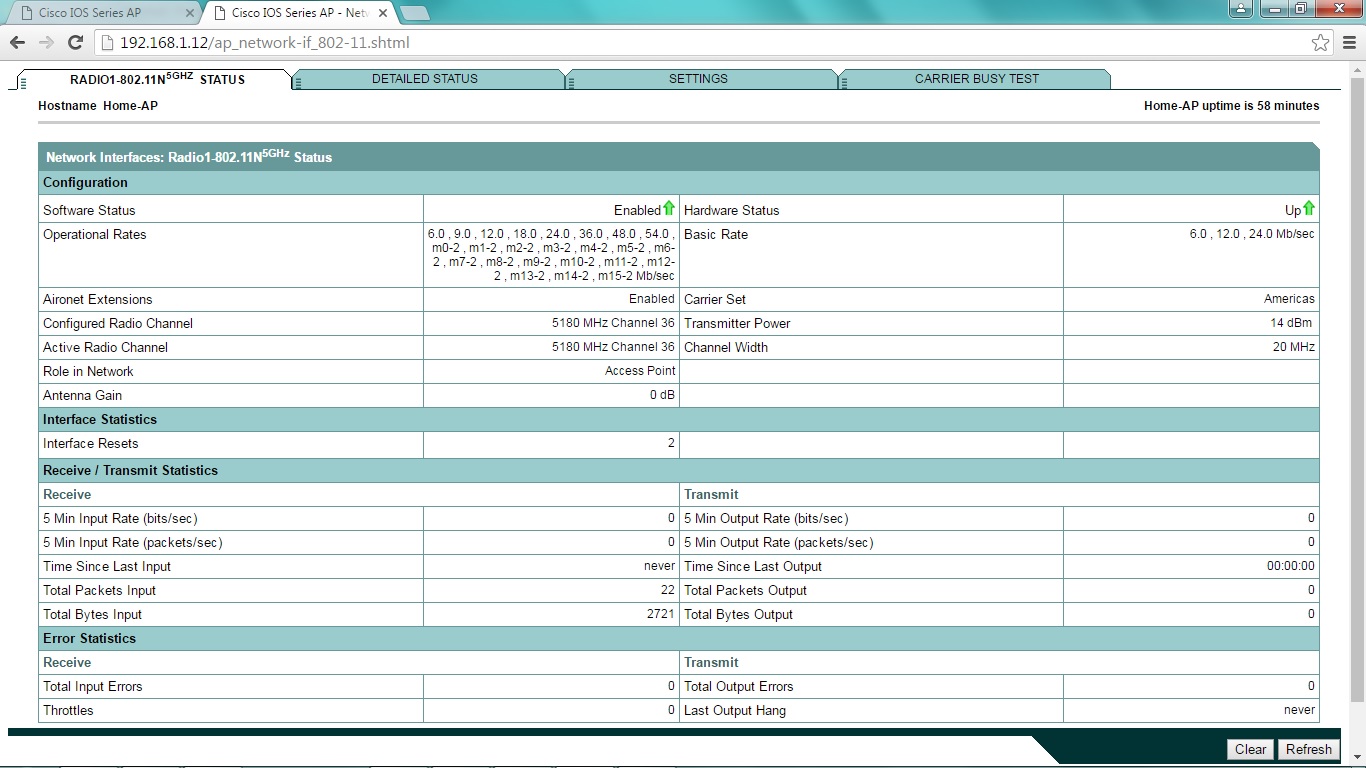
You can perform a Carrier Busy Test either on the 2.4-GHz or 5-GHz radio interface, which is just less than a minute to complete. Just click on Start. The test output will show how busy each frequency in the 2.4-GHz range (in percentage) and from there you can select the appropriate frequency which is less busy.

I tried to enable the 5-GHz interface but the status remained down.


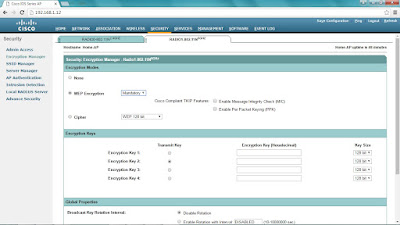
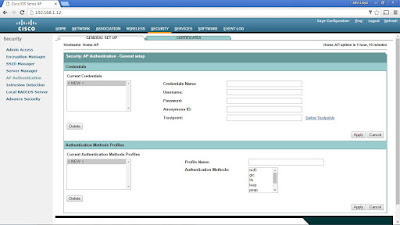
To enable the 5GHz radio interface (run in parallel with the 2.4GHz radio), you'll need to enable its interface under Security > SSID Manager > click the SSID name > tick Radio1-802.11N 5GHz > click Apply. You also need to match the encryption settings used in the 2.4 GHz radio which is found under Security > Encryption Manager > Radio1-802.11N 5GHz > Apply-Radio1 (found at the bottom page).

Enable again the 5GHz radio interface under Network > Network Interface > Radio1-802.11N 5GHz > Settings > click Enable in Enable Radio > click Apply.


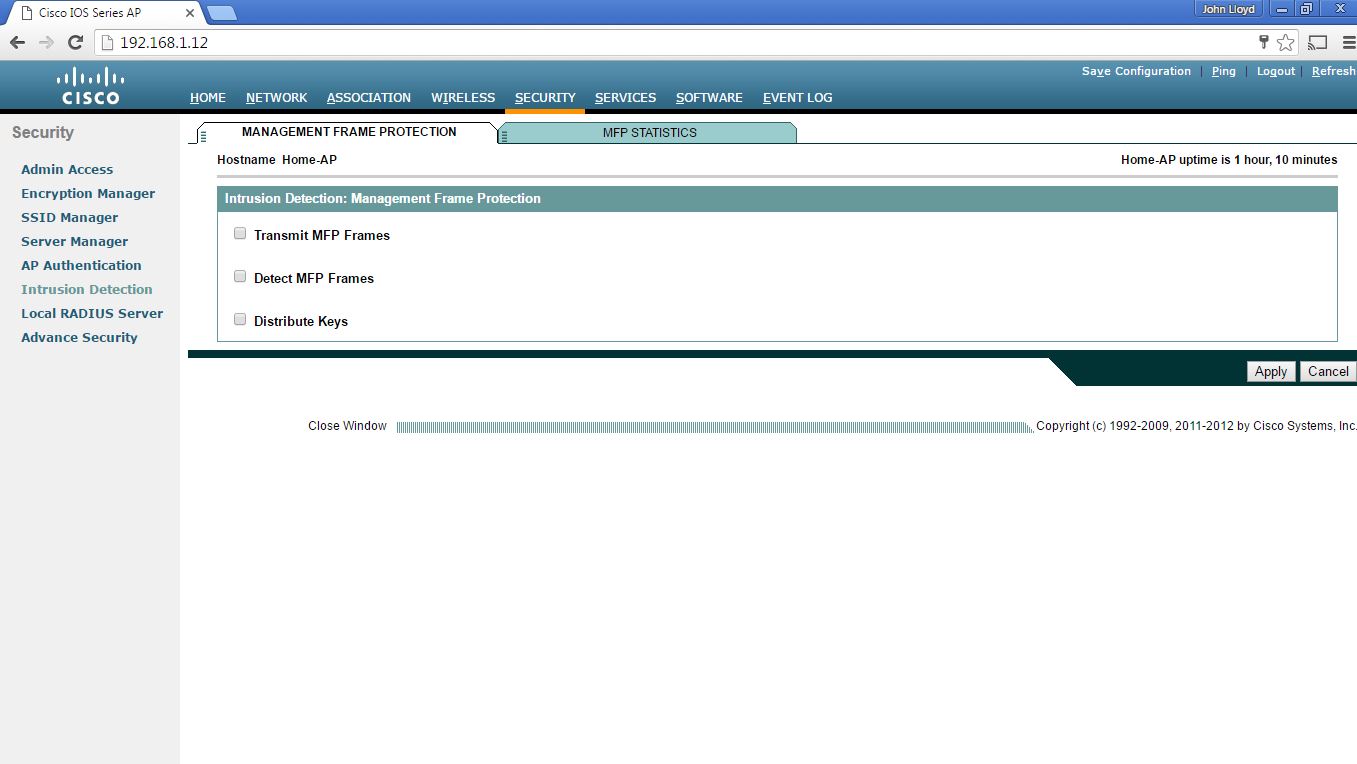
You can change the encryption properties under the Security > Encryption Manager.


Telnet is enabled by default (which is insecure). It's advisable to disable it and use SSH (and HTTPS) instead.


* A terminal emulator connected to the AP's console port
* Telnet or Secure Shell (SSH) to the APs IP address
* Use a web browser to access a graphical user interface (GUI) at the APs IP address
At a minimum, you would have to configure one or more SSIDs and some wireless security settings. In addition, you would have to set the transmit power level and channel number for each of the AP's radio.
You should connect the Ethernet port to a switch port on the wired network. The console port can remain disconnected unless you need to use it. A sticker on the AP provides the model and serial numbers, as well as the Ethernet port's MAC address.
Below is my Cisco AIR-SAP1602E standalone access point, the ports and sticker (which includes AP model, serial number and MAC address) can be found at the back. I also included its initial boot up console output.


Boot from flash
IOS Bootloader - Starting system.
FLASH CHIP: Micron N25Q256
Xmodem file system is available.
flashfs[0]: 183 files, 7 directories
flashfs[0]: 0 orphaned files, 0 orphaned directories
flashfs[0]: Total bytes: 31936000
flashfs[0]: Bytes used: 10427904
flashfs[0]: Bytes available: 21508096
flashfs[0]: flashfs fsck took 10 seconds.
Reading cookie from SEEPROM
Base Ethernet MAC address: f0:7f:06:54:25:1f
************* loopback_mode = 0
button pressed for 15 seconds // I'VE PRESSED THE RESET BUTTON AT THE BACK
process_config_recovery: set IP address and config to default 10.0.0.1
Loading "flash:/ap1g2-k9w7-mx.152-2.JB2/ap1g2-k9w7-mx.152-2.JB2"...#############################
File "flash:/ap1g2-k9w7-mx.152-2.JB2/ap1g2-k9w7-mx.152-2.JB2" uncompressed and installed, entry point: 0x100000
executing...
Restricted Rights Legend
Use, duplication, or disclosure by the Government is
subject to restrictions as set forth in subparagraph
(c) of the Commercial Computer Software - Restricted
Rights clause at FAR sec. 52.227-19 and subparagraph
(c) (1) (ii) of the Rights in Technical Data and Computer
Software clause at DFARS sec. 252.227-7013.
cisco Systems, Inc.
170 West Tasman Drive
San Jose, California 95134-1706
Cisco IOS Software, C1600 Software (AP1G2-K9W7-M), Version 15.2(2)JB2, RELEASE SOFTWARE (fc1) // K9W7 IOS USED BY AUTONOMOUS AP
Technical Support: http://www.cisco.com/techsupport
Copyright (c) 1986-2013 by Cisco Systems, Inc.
Compiled Mon 29-Jul-13 12:16 by prod_rel_team
Initializing flashfs...
FLASH CHIP: Micron N25Q256
flashfs[3]: 183 files, 7 directories
flashfs[3]: 0 orphaned files, 0 orphaned directories
flashfs[3]: Total bytes: 31808000
flashfs[3]: Bytes used: 10427904
flashfs[3]: Bytes available: 21380096
flashfs[3]: flashfs fsck took 9 seconds.
flashfs[3]: Initialization complete.
flashfs[4]: 0 files, 1 directories
flashfs[4]: 0 orphaned files, 0 orphaned directories
flashfs[4]: Total bytes: 11999232
flashfs[4]: Bytes used: 1024
flashfs[4]: Bytes available: 11998208
flashfs[4]: flashfs fsck took 0 seconds.
flashfs[4]: Initialization complete....done Initializing flashfs.
Warning: the compile-time code checksum does not appear to be present.
Radio0 present 8764B 8000 0 A8000000 A8010000 0
Rate table has 180 entries (48 SGI/72 BF variants)
Radio1 present 8764B 8000 0 88000000 88010000 4
This product contains cryptographic features and is subject to United
States and local country laws governing import, export, transfer and
use. Delivery of Cisco cryptographic products does not imply
third-party authority to import, export, distribute or use encryption.
Importers, exporters, distributors and users are responsible for
compliance with U.S. and local country laws. By using this product you
agree to comply with applicable laws and regulations. If you are unable
to comply with U.S. and local laws, return this product immediately.
A summary of U.S. laws governing Cisco cryptographic products may be found at:
http://www.cisco.com/wwl/export/crypto/tool/stqrg.html
If you require further assistance please contact us by sending email to
export@cisco.com.
Warning: the compile-time code checksum does not appear to be present.
cisco AIR-SAP1602E-A-K9 (PowerPC) processor (revision B0) with 98294K/32768K bytes of memory.
Processor board ID FGL1835XABC
PowerPC CPU at 533Mhz, revision number 0x2151
Last reset from power-on
1 Gigabit Ethernet interface
2 802.11 Radios
32K bytes of flash-simulated non-volatile configuration memory.
Base ethernet MAC Address: F0:7F:06:54:25:1F
Part Number : 73-14508-04
PCA Assembly Number : 000-00000-00
PCA Revision Number :
PCB Serial Number : FOC18335DKG
Top Assembly Part Number : 800-38553-01
Top Assembly Serial Number : FGL1835XABC
Top Revision Number : A0
Product/Model Number : AIR-SAP1602E-A-K9
Press RETURN to get started!
*Mar 1 00:00:11.919: %SOAP_FIPS-2-SELF_TEST_IOS_SUCCESS: IOS crypto FIPS self test passed
*Mar 1 00:00:13.703: %SOAP_FIPS-2-SELF_TEST_RAD_SUCCESS: RADIO crypto FIPS self test passed on interface Dot11Radio 0
*Mar 1 00:00:14.815: %SOAP_FIPS-2-SELF_TEST_RAD_SUCCESS: RADIO crypto FIPS self test passed on interface Dot11Radio 1
*Mar 1 00:00:15.755: not a autoconfig enabled device!!!
*Mar 1 00:00:17.083: %LINK-6-UPDOWN: Interface GigabitEthernet0, changed state to up
*Mar 1 00:00:18.083: %LINEPROTO-5-UPDOWN: Line protocol on Interface GigabitEthernet0, changed state to up
*Mar 1 00:00:26.771: AUTOINSTALL: GigabitEthernet0 is assigned 192.168.1.11
*Mar 1 00:01:14.943: Starting Ethernet promiscuous mode
*Mar 1 00:01:15.007: %LINK-5-CHANGED: Interface Dot11Radio0, changed state to administratively down
*Mar 1 00:01:15.007: %LINK-5-CHANGED: Interface Dot11Radio1, changed state to administratively down
*Mar 1 00:01:16.007: %LINEPROTO-5-UPDOWN: Line protocol on Interface Dot11Radio0, changed state to down
*Mar 1 00:01:16.007: %LINEPROTO-5-UPDOWN: Line protocol on Interface Dot11Radio1, changed state to down
*Mar 1 00:01:20.527: %SYS-5-RESTART: System restarted --
Cisco IOS Software, C1600 Software (AP1G2-K9W7-M), Version 15.2(2)JB2, RELEASE SOFTWARE (fc1)
Technical Support: http://www.cisco.com/techsupport
Copyright (c) 1986-2013 by Cisco Systems, Inc.
Compiled Mon 29-Jul-13 12:16 by prod_rel_team
*Mar 1 00:01:20.527: %SNMP-5-COLDSTART: SNMP agent on host ap is undergoing a cold start
*Mar 1 00:01:21.511: %LINEPROTO-5-UPDOWN: Line protocol on Interface BVI1, changed state to up
*Mar 1 00:01:28.259: %CDP_PD-4-POWER_OK: Full power - NEGOTIATED inline power source
*Mar 1 00:01:31.531: %DHCP-6-ADDRESS_ASSIGN: Interface BVI1 assigned DHCP address 192.168.1.12, mask 255.255.255.0, hostname ap
ap>enable
Password: Cisco // INITIAL LOGIN AND ENABLE PASSWORD IS Cisco
By default, an AP will try to use Dynamic Host Configuration Protocol (DHCP) to request an IP address for itself. If it is successful, you can connect to it and interact with its GUI or command-line interface (CLI). If not, the AP will use the static IP address 10.0.0.1/26. You can also use the console port to configure a static IP address on the BVI interface of the AP, but it is usually more flexible and convenient to let it request an address on its own.
An autonomous AP binds the IP address to its bridged-virtual interface (BVI), which is a logical interface used to bridge the physical wired and wireless interfaces. If you are connected to the AP's console port, you can display the IP address with the show interface bvi1 command.
ap#show interface bvi1
BVI1 is up, line protocol is up
Hardware is BVI, address is f07f.0654.251f (bia f07f.0654.251f)
Internet address is 192.168.1.12/24 // TYPE THE IP ON BROWSER TO USE GUI (HTTP)
MTU 1500 bytes, BW 54000 Kbit/sec, DLY 5000 usec,
reliability 255/255, txload 1/255, rxload 1/255
Encapsulation ARPA, loopback not set
Keepalive set (10 sec)
ARP type: ARPA, ARP Timeout 04:00:00
Last input 00:01:53, output never, output hang never
Last clearing of "show interface" counters never
Input queue: 0/75/0/0 (size/max/drops/flushes); Total output drops: 0
Queueing strategy: fifo
Output queue: 0/0 (size/max)
5 minute input rate 0 bits/sec, 0 packets/sec
5 minute output rate 0 bits/sec, 0 packets/sec
7 packets input, 1242 bytes, 0 no buffer
Received 0 broadcasts (0 IP multicasts)
0 runts, 0 giants, 0 throttles
0 input errors, 0 CRC, 0 frame, 0 overrun, 0 ignored, 0 abort
8 packets output, 1302 bytes, 0 underruns
0 output errors, 0 collisions, 0 interface resets
0 unknown protocol drops
0 output buffer failures, 0 output buffers swapped out
By default, an autonomous AP has its radios disabled and does not have any SSIDs configured This is done to prevent the new AP from interfering with any existing signals before you have a chance to configure it. This also prevents anyone from inadvertently discovering a wireless signal coming from the AP before you can secure it. The easiest method you can use to configure an autonomous AP is to use its web interface. Once you know the AP's IP address, you can open a web browser to it. By default, you can leave the username blank and enter the password as Cisco.


At the CCNA Wireless level, you need to be able to perform basic configuration tasks on autonomous APs. Therefore, you should be familiar with only the Summary and Easy Setup menus at the upper-left corner of the web page, as found under the Home tab. To use the Easy Setup page, you need to enter the following information about the AP:
* Hostname
* Method of IP address assignment
* For a static address: IP address, subnet mask, default gateway
* An administrative username and password
* SNMP community

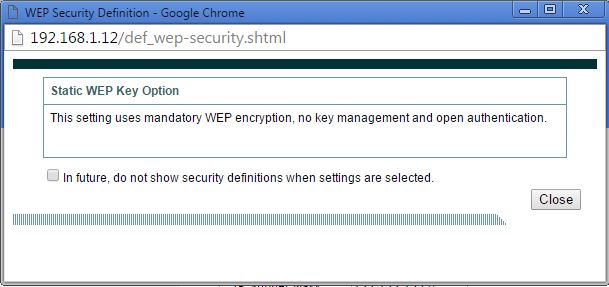
A pop-up like message will appear if you chose WEP as the Security method.

Next, select the type of wireless security you want to offer on the SSID. By default, each radio is configured to operate in the Access Point role, so that the AP offers an active BSS. You can select one of the following roles instead from the Role in Radio Network drop-down menu:
* Repeater - The AP will associate with another nearby AP automatically, to repeat or extend that AP's cell coverage. The Ethernet port will be disabled.
* Root bridge - The AP uses its Ethernet port to connect to bridge the wired network to a remote wireless bridge over a point-to-point or point-to-multipoint link. No wireless clients will be allowed to associate.
* Non-Root Bridge - The AP will act as a remote wireless bridge and will connect to a root bridge AP over a wireless link.
* Workgroup Bridge - The AP will use one radio to associate with a nearby Cisco access point, as if it is a wireless client. The AP bridges between its radio and its Ethernet port. You can use an AP in workgroup bridge (WGB) mode to provide wireless client capability to wired-only devices.
* Universal Workgroup Bridge - The AP will act as a workgroup bridge to associate with Cisco and non-Cisco access points.
* Scanner - The AP will use its radio to scan channels and collect data.
* Spectrum - The AP will devote its radios to scanning the frequency band and collecting information about RF usage and interference.
The Optimize Radio Network drop-down menu enables you to select how the AP will optimize its cell for wireless clients. By default, the AP will offer data rates that can provide good range and throughput. You can select Throughput to leverage higher data rates at the expense of cell range or Range to require the lowest data rate for maximum cell range.
At the bottom of the Radio Configuration page, you can select the channel that the AP will use. By default, the channel is set to Least-Congested (2.4 GHz) and Dynamic Frequency Selection (5 GHz) so that the AP will scan and find a channel that it considers to be most viable in its current location. This is not always a best practice because the AP will choose any channel number that it sees fit. That means the 2.4-GHz radio might end up on channel 3 if channels 1 and 11 are already in use. A better practice is to select a specific channel for each radio instead. Each radio has a transmit power setting, too - each defaults to its maximum power rating or a specific dBm level that you select. Click Apply for the settings to take effect.

At this point of the configurations, you do not necessarily have a functional AP because the radios are still disabled. To enable a radio, navigate to the AP's home page and select Network > Network Interface > Radio0-802.11N22.4GHz or Radio1-802.11N5GHz. Click the Settings tab to open it, and then select the Enable button next to Enable Radio.


As you are configuring an autonomous AP, keep in mind that the changes you make are applied to the running configuration and will not be saved if the AP loses power or reboots. Click the Save Configuration link in the upper-right corner of the screen to save the whole AP configuration into non-volatile memory (NVRAM).

Below are the screenshots tested from my iPhone which was associated to the SSID Lagura.


Below are the screenshots taken from each tab. You can check the associated wireless clients on the autonomous AP by going to the Association tab.


You can change the AP's management IP address (from DHCP to static IP) by going to Network > Network Interface > IP Address.


You can perform a Carrier Busy Test either on the 2.4-GHz or 5-GHz radio interface, which is just less than a minute to complete. Just click on Start. The test output will show how busy each frequency in the 2.4-GHz range (in percentage) and from there you can select the appropriate frequency which is less busy.


I tried to enable the 5-GHz interface but the status remained down.


To enable the 5GHz radio interface (run in parallel with the 2.4GHz radio), you'll need to enable its interface under Security > SSID Manager > click the SSID name > tick Radio1-802.11N 5GHz > click Apply. You also need to match the encryption settings used in the 2.4 GHz radio which is found under Security > Encryption Manager > Radio1-802.11N 5GHz > Apply-Radio1 (found at the bottom page).


Enable again the 5GHz radio interface under Network > Network Interface > Radio1-802.11N 5GHz > Settings > click Enable in Enable Radio > click Apply.


You can change the encryption properties under the Security > Encryption Manager.


Telnet is enabled by default (which is insecure). It's advisable to disable it and use SSH (and HTTPS) instead.


No comments:
Post a Comment